Summer is a great time to grab your camera and head out into nature to capture the great outdoors. Perhaps you’re heading to a national or state park and want to capture its glory. Or you might want to set up a model for an outdoor portrait session. Maybe preserving memories of a backyard barbecue or day at the beach is more your style.

Whatever you’re looking to capture, now is a great time to hone your skills. We chatted with a few professional photographers to learn how to make the most of the great outdoors. Keep reading to learn more.
How Outdoor Photography Is Different from Indoor Photography
It’s clear that indoor photos look different from ones taken outside. Natural lighting is a major factor. But what else makes taking pictures outside so different from taking indoor pictures?
Infinite possibilities
According to Sam Breach, a commercial and portrait photographer, “Shooting outside gives you an infinite number of possibilities. Not only do you have access to the largest, brightest light source of all — the sun — you also have a wide range of vistas and backdrops and a lot of space in which to play.”
Freedom to play
The freedom to play relaxes your subjects, too. “Inside is a more intimate experience. Outdoors you feel more expansive,” says Pixie from Pixie Vision Photography. She believes an outdoor environment can soften a subject’s attention. “They’re more relaxed. They can shine more.”
Light variety
Freedom to play allows for more variety with textures and light, too. If you set up your subject facing the sun, they’ll end up squinting, and there will be “hot spots” on their face. You want the light to be even.
Pixie explains that you can create a halo effect by setting up your subject with the sunlight behind them, “so the light is glowing. Use a reflector to bounce the light into their face.” Reflectors can cost as little as $20 on sites like Amazon.
Composition options
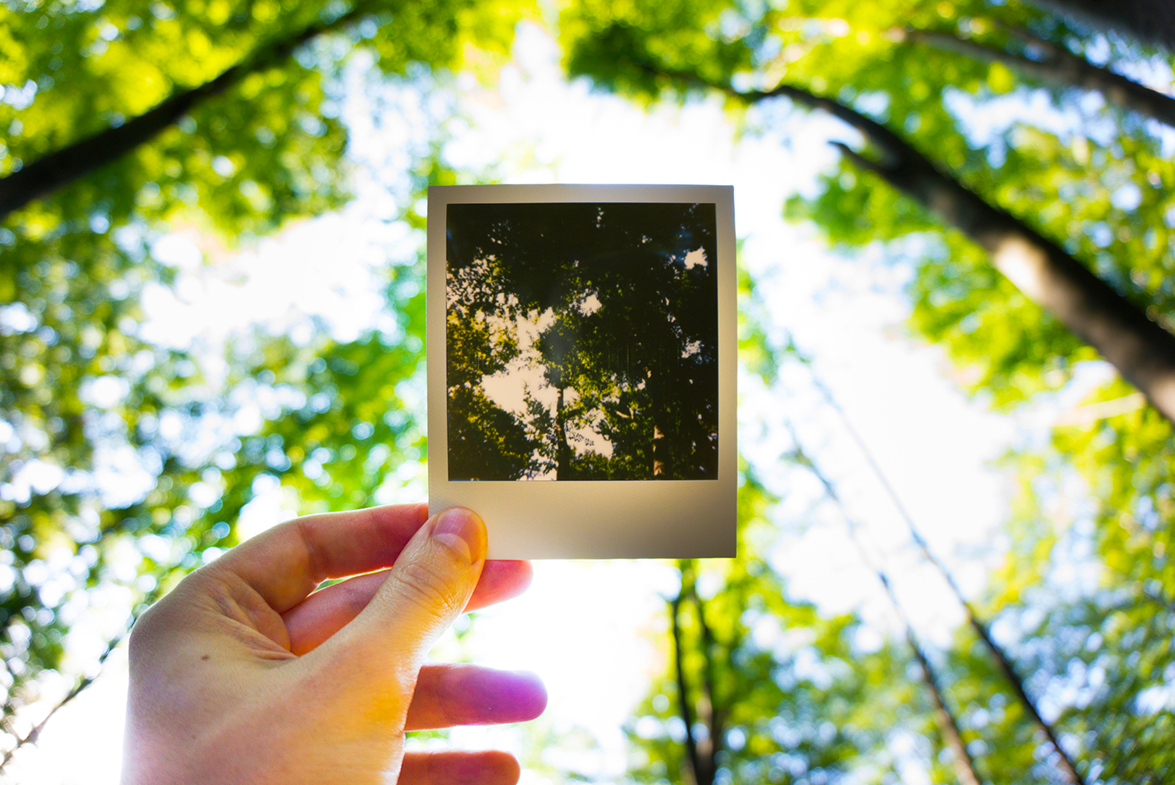
Shooting outside allows for more flexibility with your composition, because you have a greater variety of spaces available. For composition, think of your photo as three parts: foreground, middle ground, and background. If there’s something of interest in each section, your photo will have more depth.
According to Ryan Burroughs, a photographer in San Francisco, “Shooting from different distances and heights makes your background more — or less! — interesting.” So head for the hills or climb a tree and see where your creativity takes you.
How to Capture a Spontaneous Shot
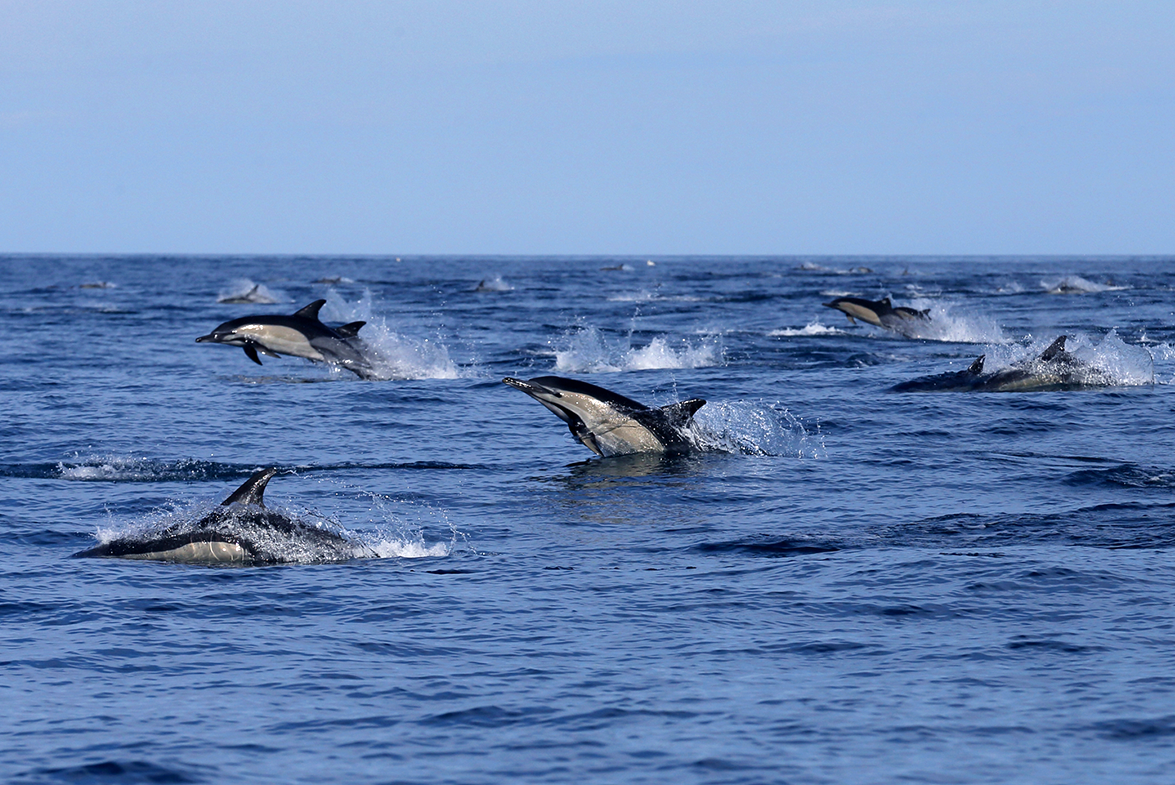
We’ve all been there: seeing children on the beach while dolphins are jumping in the background (or some other can’t-miss moment), and wishing we had a picture of it. While it’s currently impossible to pause time, the best way to never miss a shot is to have your camera with you and ready.
Be prepared
“If it’s in your hand,” says Sam, “with the lens cap off and already set up to shoot for the current lighting conditions, then that’s a bonus in your favor. Knowing the settings on your camera inside out will give you a further advantage.”
Use burst mode
For fast-moving subjects, like jumping dolphins and running children, the setting to know is burst mode, also known as continuous high-speed mode. This setting captures several photos in quick succession when you hold down the shutter button.
Many camera phones offer this option. Just tap and hold the shutter button to take up to around 20 photos in one moment.
If you’re shooting with a DSLR, first double-check that your camera has this feature, since it’s optional on many cameras. Then hold the shutter button down while you capture the moment. Some cameras can capture up to 40 images per second.
Set to 1/250
If you’re adept at manually adjusting your shutter speed, the setting you’ll want for jumping dolphins is 1/250. For best results, add a 70-200mm telephoto zoom lens.
A telephoto lens also helps you to be as unobtrusive as possible, says Pixie. “Make yourself small. You don’t want to get in the way of that moment. You don’t matter; the moment matters. You’re a documentarian.”

Practice Brings Control
There’s really only one way to improve your photography skills: by practicing them. Arm yourself with your phone’s camera or your DSLR set to automatic mode and start shooting.
Just keep trying
“In the long term,” says Sam, “there is no substitute for arming yourself with knowledge, understanding the foundation of photographic principles, and practicing what you learn.”
Learn from mistakes
Taking your camera to the beach or the park and shooting various subjects can be a great place to start. Sam suggests, “Try shooting the same subject repeatedly but changing the settings on your DSLR each time, so you start to understand how the end result is affected by each setting.”
Learning your camera’s settings and their results gives you more control, which ultimately “gives you the power to create the image in your mind’s eye, rather than letting the camera decide for you.”
Don’t be shy
If you’re a beginner, you might feel awkward taking pictures of people you don’t know. But try not to be that person creeping around in the corner of the park. Shake off your shyness and practice approaching people first.
According to Ryan, “While the law says no one has an expectation of privacy out in public, it’s more fun for everyone to only shoot people who want to be shot. Ask with a smile.”

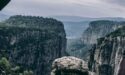
Shooting Giants (Mountains and Canyons)
Traveling to areas with tremendous natural beauty can be a photo buff’s dream. But if you’ve ever tried to photograph a mountain, it’s possible you’ve been disappointed — at least as a beginner.
It can be tough to translate awe-inspiring nature to a photo. “It was so much better in person,” we end up saying with a shrug. That said, there are some tricks to capturing nature’s beauty in all its glory.
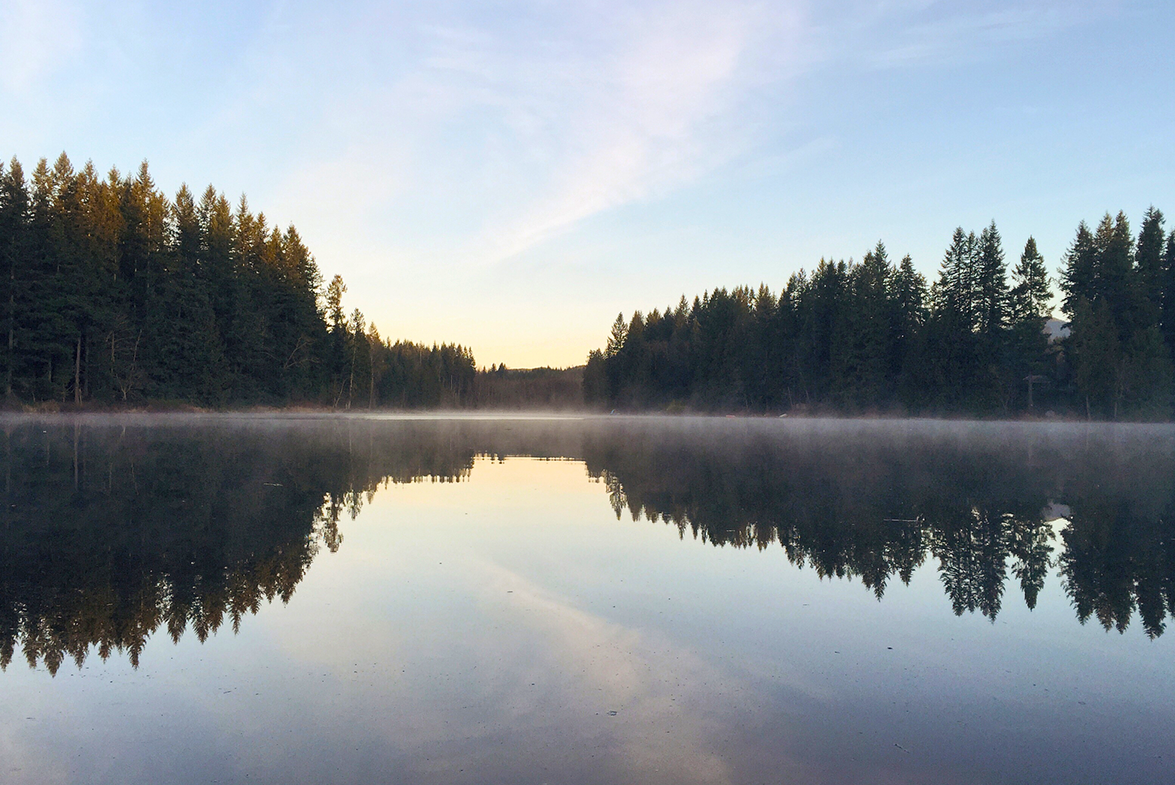
Time it right
Timing is crucial. Professional photographers swoon over the “golden hour.” This period just before sunrise or sunset is when the lighting turns the world beautiful.
“Never, ever, ever shoot between 11AM and 1PM!” advises Pixie (with a laugh). “The light is so flat then.” Also, take note of the direction of the sun on your subject. “Some places will get beautiful light in the morning, others in the evening,” says Ryan. “If possible, scout it out.”
Get up early
Sunset is a popular time to photograph natural treasures, but early birds might have an edge.
“The advantage to traveling in the summertime is that the sun rises really early,” says Sam. “People on vacation don’t usually want to wake up at the crack of dawn, so tourist locations will be far quieter at this time. … Not only is the light more beautiful at this time as it transitions from blue hour to golden hour, you’ll be competing with fewer people for the best compositions.”
Drone carefully
If you’re considering using a drone to capture nature’s bounty from above, be aware of newer laws. “Do some research before you fly,” recommends Ryan. “Drones have been banned in many national parks.”
Take Only Pictures and Leave Only Footprints
While you’re tromping around in nature taking photos of it, you’ll want to be aware of your impact on the area. “Don’t stand on plants if you can help it,” advises Pixie. Sometimes that will require a stretch of the imagination.
Get creative
According to Sam, “There is no greater achievement than being able to think outside the box while remaining in the confines of the box. Creativity is born from restraint. Work your imagination to make the best of what you have access to.”
Watch your step
Leave the wildlife alone. Don’t pick flowers to decorate your subject or take home “souvenirs.” Don’t feed the animals. Remove any trash and adhere to the principle of leave no trace.
Ryan suggests, “Use a telephoto lens to get up close and personal without physically disturbing anything.”
Know your place
Be a good sport and play by the rules. This means keeping your park visits legit: pay your parking fees and entrance permits. “Pay the fee gladly,” says Pixie. “It goes to beautify the park.”
“Don’t ignore signs which advise you to keep to the path,” says Sam, “and don’t climb over fences or barriers designed to keep humans out. The world is a big place, and you don’t need to sneak past a no-entry sign to create a great image.”
Share the beauty
Finally, remember why you’re taking pictures in the great outdoors in the first place: because you find it beautiful. Allow that beauty to flow through your photos, so others can enjoy it, too. A shared experience can have far-reaching effects. As Pixie puts it, “You’re a ripple.”
Find coupons for cameras, photography equipment, and photography accessories
Do you have any favorite outdoor photography tips? Share them in the comments!
Special thank you to:
- Sam Breach, Commercial and Portrait Photographer, sambreach.com
- Pixie from Pixie Vision Photography, pixievision.com
- Ryan Burroughs, Photographer, San Francisco